
As summer approaches, it’s important for homeowners to take proactive steps to ensure the health and survival of their plants and trees. The intense heat, dryness, and strong sunlight that come with the summer months can be challenging for your garden, but with some proper care and attention, you can help your plants thrive. Here are some tips to help you determine whether your plants and trees are going to survive the summer, as well as strategies for proper care during the hot months.
One of the most important things to watch for is the moisture level in your soil. Plants need consistent moisture to survive in the heat. Check the soil around your plants and trees regularly. If it feels dry an inch below the surface, it’s time to water.
When you water your plants and trees, water deeply rather than just wetting the surface. This encourages roots to grow deeper, which helps them withstand drought conditions. Aim to water early in the morning or late in the evening to minimize evaporation.
The condition of your plants’ leaves can be a good indicator of their overall health. Look for signs of stress such as yellowing, wilting, or curling leaves. If you notice any of these symptoms, your plants may need more water, shade, or protection from pests.
Applying a layer of mulch around your plants and trees helps retain soil moisture and keep roots cool. Organic mulches such as wood chips, straw, or bark also add nutrients to the soil as they decompose.
In particularly hot climates, your plants may benefit from some shade during the hottest part of the day. Consider using shade cloths or positioning plants in areas that receive partial shade.
While it’s important to nourish your plants, too much fertilizer during the hot months can stress them out. Use a slow-release fertilizer or organic compost to give your plants the nutrients they need without overwhelming them.
Summer is a good time to prune certain plants, but be cautious not to remove too much foliage, as this can expose them to sunburn and stress. Focus on removing dead or diseased branches, and avoid heavy pruning on trees that are not drought-resistant.
Pests can be more active during the summer, and infestations can quickly damage your plants. Keep an eye out for signs of pests such as holes in leaves or chewed stems. Introduce beneficial insects or use organic pest control methods to keep pests in check.
When selecting new plants for your garden, consider choosing drought-resistant varieties. These plants are better equipped to handle the summer heat and require less water.
Keep an eye on the weather forecast to adjust your watering schedule as needed. For example, if a heatwave is expected, your plants may need extra watering.
By paying close attention to your plants and trees and following these tips, you can help ensure they survive and even thrive during the summer months. With proper care and attention, your garden can be a beautiful and healthy oasis all summer long.
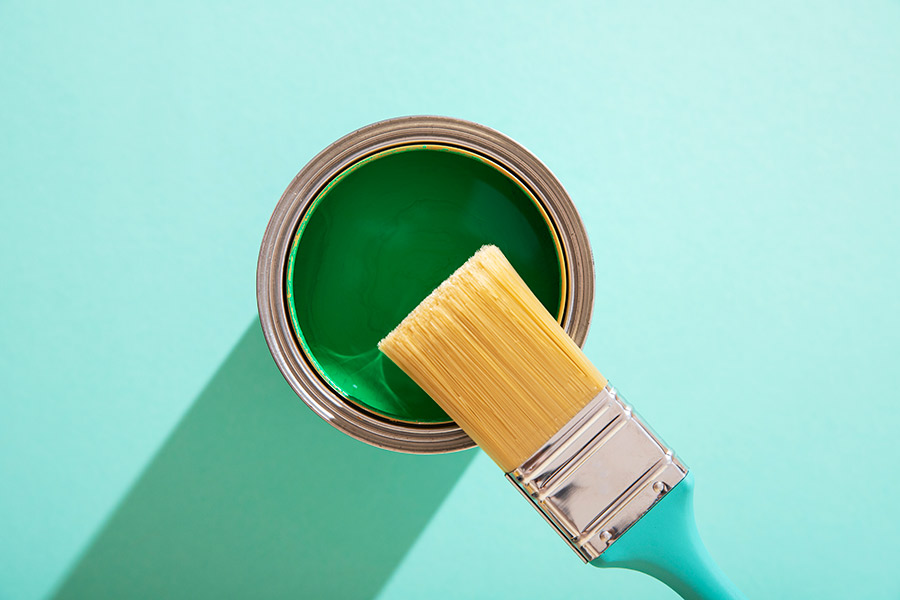
Your home is more than just a structure; it’s an extension of yourself, a canvas where you express your personality and style. Every color you choose to paint your house, both inside and out, tells a unique story about who you are. From bold statements to subtle nuances, let’s explore what the colors of your home reveal about your personality.
Vibrant Reds: If your home boasts a fiery red exterior, it signifies confidence, energy, and a zest for life. You’re likely outgoing, adventurous, and not afraid to stand out in a crowd. Your home serves as a beacon of warmth and vitality in the neighborhood.
Soothing Blues: A serene blue exterior reflects a calm and collected personality. You value peace, harmony, and stability in your life. Your home exudes tranquility, inviting guests to relax and unwind in its comforting embrace.
Earthy Greens: Choosing green for your home’s exterior suggests a deep connection to nature and a nurturing spirit. You’re down-to-earth, practical, and value growth and renewal. Your home serves as a sanctuary, blending seamlessly with its natural surroundings.
Classic Whites: Opting for a crisp white exterior indicates a timeless and sophisticated taste. You appreciate simplicity, cleanliness, and elegance in design. Your home radiates purity and perfection, making a lasting impression on passersby.
Bold Blacks: A black exterior exudes power, mystery, and modernity. You’re bold, confident, and unapologetically unique. Your home commands attention, making a statement that you’re not afraid to go against the norm.
Passionate Reds: If your interior walls are painted in shades of red, you’re likely passionate, romantic, and full of energy. Red stimulates the senses and fosters intimacy, creating a vibrant atmosphere perfect for social gatherings and lively conversations.
Tranquil Blues: Choosing blue for your interior reflects a calm and introspective nature. You value clarity, communication, and emotional balance. Blue hues promote relaxation and productivity, making your home a serene retreat from the chaos of the outside world.
Warm Yellows: A sunny yellow interior radiates optimism, creativity, and joy. You have a cheerful disposition and a playful spirit. Yellow encourages positivity and optimism, infusing your home with warmth and happiness.
Earthy Browns: If your interior spaces are adorned with shades of brown, you’re likely grounded, practical, and dependable. Brown evokes a sense of security and stability, creating a cozy and inviting atmosphere where friends and family feel welcome.
Soothing Greens: Green interior walls signify a deep connection to nature and a desire for balance and renewal. You’re nurturing, harmonious, and environmentally conscious. Green promotes relaxation and rejuvenation, fostering a sense of well-being within your home.
Elegant Grays: Opting for gray tones in your interior design showcases sophistication, versatility, and refinement. You have a discerning eye for style and appreciate understated elegance. Gray provides a neutral backdrop for showcasing artwork and furnishings, allowing your personality to shine through in the details.
The colors you choose to paint your home, both inside and out, are a reflection of your personality, values, and aspirations. Whether you prefer bold statements or subtle nuances, your home serves as a canvas for expressing your unique identity to the world. So, next time you reach for a paintbrush, consider the story you want your home to tell.

As a homeowner, maintaining a lush and vibrant lawn is often a top priority. However, the persistent presence of weeds can be a relentless obstacle to achieving that goal. Weeds not only detract from the aesthetic appeal of your yard but also compete with your plants for essential nutrients, sunlight, and water. Fortunately, there are effective strategies for weed control, both with and without the use of chemicals. Let’s explore some methods to keep your lawn weed-free and thriving.
Effective weed control requires a combination of strategies tailored to your specific needs and preferences. While natural methods offer environmentally friendly alternatives, chemical herbicides can provide rapid and thorough eradication of weeds when used responsibly. By incorporating these methods into your lawn care routine, you can achieve a weed-free yard that’s the envy of the neighborhood.

When it comes to selling your home, staging is key. From decluttering to enhancing curb appeal, every detail matters in making a lasting impression on potential buyers. Among the many factors that contribute to a buyer’s experience, one often overlooked element is the scent of the home. Yet, the power of smell can significantly impact a buyer’s perception and ultimately influence their decision-making process.
Imagine walking into a home filled with the comforting aroma of freshly baked cookies or a bouquet of fresh flowers. These pleasant scents evoke feelings of warmth, comfort, and homeliness, creating an inviting atmosphere that instantly puts buyers at ease. Studies have shown that certain fragrances can evoke positive emotions and even trigger nostalgia, helping potential buyers form a connection with the property on an emotional level.
On the other hand, unpleasant odors can have the opposite effect, turning off prospective buyers and souring their perception of the home. Lingering smells from pets, cooking, or smoke can create a negative first impression, making it difficult for buyers to envision themselves living in the space. Even seemingly minor odors like mustiness or mildew can raise red flags and signal potential issues with the property.
To maximize the appeal of your home, it’s essential to be mindful of the scents that greet potential buyers. Here are some tips for harnessing the power of home fragrances to your advantage.
Ultimately, the goal is to create a sensory experience that leaves a lasting impression on potential buyers. By harnessing the power of home fragrances and paying attention to the subtle details, you can elevate your home staging efforts and increase your chances of a successful sale. So, the next time you’re preparing to showcase your home, remember to think beyond the visual appeal and consider the power of scent in shaping buyer perceptions.

As a homeowner with a penchant for rolling up your sleeves and tackling DIY projects around the house, there’s a certain satisfaction that comes with fixing things and enhancing your living space with your own hands. DIY home improvements not only save money but also empower you to customize your home to suit your tastes and needs. However, there are times when it’s crucial to recognize your limits and enlist the help of professionals to ensure safety, efficiency, and quality results.
Painting:Painting walls, ceilings, and even furniture is one of the most accessible DIY projects for homeowners. With the right tools and techniques, you can transform a room’s appearance in a weekend, saving on labor costs and expressing your creativity through color choices.
Installing Shelving and Cabinets: Adding storage solutions like shelves and cabinets is another manageable DIY task. With basic carpentry skills and some careful measuring, you can optimize space and organization in your home without breaking the bank.
Landscaping: Tackling outdoor projects like gardening, planting, and basic landscaping can be immensely rewarding. From creating flower beds to laying down mulch, these tasks allow you to beautify your property and enhance curb appeal with your personal touch.
Minor Plumbing Fixes: Dealing with small plumbing issues such as fixing a leaky faucet, unclogging drains, or replacing a toilet flapper is within the realm of DIY for many homeowners. However, if the problem is complex or involves major installations, it’s best to call a plumber.
Simple Electrical Work: Installing light fixtures, replacing switches or outlets, and troubleshooting minor electrical problems can often be accomplished by DIY enthusiasts who follow safety precautions and adhere to local building codes. Always turn off the power before working on electrical systems.
Structural Changes: Any modifications that affect the structural integrity of your home, such as removing load-bearing walls or altering rooflines, should be left to licensed contractors or structural engineers. Incorrect alterations can compromise the safety and stability of your house.
Roof Repairs: While small roof maintenance tasks like replacing shingles or sealing leaks may seem manageable, roofing work can be hazardous without proper training and equipment. Roofing professionals have the expertise to identify underlying issues and execute repairs safely.
Major Plumbing Projects: Complex plumbing tasks like replacing pipes, installing water heaters, or remodeling bathrooms require specialized knowledge and equipment. Improper installations can lead to water damage, leaks, and costly repairs down the line.
Electrical Upgrades: Upgrading electrical systems, rewiring circuits, or installing new outlets in older homes demands expertise to ensure compliance with building codes and prevent fire hazards. Professional electricians have the training and certification to handle these jobs safely.
HVAC Maintenance and Repairs: Servicing heating, ventilation, and air conditioning systems involves intricate components and potentially hazardous gases. HVAC technicians possess the skills and tools to diagnose issues, perform maintenance, and make repairs efficiently.
While the allure of saving money and mastering new skills through DIY projects is undeniable, it’s essential to recognize the limitations of your expertise and prioritize safety and quality. Knowing when to call in the professionals can prevent costly mistakes, safeguard your home’s value, and provide peace of mind. So, whether you’re sprucing up your space with a fresh coat of paint or contemplating a major renovation, remember to assess the scope of the project and enlist help when needed. After all, a well-maintained and beautifully renovated home is the ultimate reward for homeowners who strike the perfect balance between DIY enthusiasm and professional expertise.

As the winter chill begins to subside and the first signs of spring emerge, it’s time to shift our focus to the revitalization of our outdoor spaces. Preparing your lawn and plants for the upcoming season is crucial to ensure a lush, vibrant landscape throughout the warmer months. Here’s a comprehensive guide to help you get started on your spring garden preparations.
Before diving into any spring preparations, take a stroll through your garden and assess the current state of your lawn and plants. Look for any signs of winter damage, such as dead branches, pest infestations, or diseases. Understanding the specific needs of your garden will guide your approach to spring care.
Remove any accumulated debris from your garden beds, lawn, and around your plants. Dead leaves, branches, and other organic matter can harbor pests and diseases. Cleaning up the debris not only improves the aesthetic appeal but also promotes a healthier garden environment.
Pruning is a vital step in preparing your plants for spring. Trim back dead or damaged branches, and shape your shrubs and trees for optimal growth. Be sure to research the specific pruning requirements for each type of plant, as some may require a more delicate touch than others.
Conduct a soil test to determine the pH levels and nutrient content of your soil. Based on the results, amend the soil with organic matter, compost, or fertilizers to ensure a nutrient-rich foundation for your plants. Healthy soil is the key to robust plant growth.
For a lush and green lawn, start by raking away any remaining dead grass and thatch. Aeration can help improve soil compaction and allow nutrients to penetrate the roots more effectively. Overseeding can fill in bare patches, while a spring-appropriate fertilizer will give your lawn the nutrients it needs to thrive.
Early spring is the perfect time to tackle weeds before they take over your garden. Pull out any existing weeds, and consider applying a pre-emergent herbicide to prevent weed seeds from germinating. Mulching around your plants can also help suppress weed growth.
Ensure that your irrigation system is in good working order. Check for leaks, clogs, or damaged components. Proper watering is crucial for the health of your plants, so make any necessary repairs or adjustments to your irrigation system.
Spring is when many pests become active, so be proactive in protecting your plants. Consider introducing beneficial insects, such as ladybugs or predatory beetles, to control pest populations naturally. If necessary, use environmentally friendly pesticides in targeted areas.
Now that your garden is prepped and ready, plan your spring planting. Choose plants that thrive in your specific climate and consider incorporating a mix of annuals and perennials for a dynamic and ever-changing landscape. Pay attention to planting guidelines, including spacing and sunlight requirements.
Mulching is a simple yet effective way to conserve soil moisture, suppress weeds, and regulate soil temperature. Apply a layer of organic mulch around your plants, leaving space around the stems to prevent moisture-related issues.
By following these steps, you’ll set the stage for a vibrant and flourishing garden come springtime. Taking the time to prepare your lawn and plants now will reward you with a beautiful and healthy outdoor space to enjoy throughout the growing season. Happy gardening!
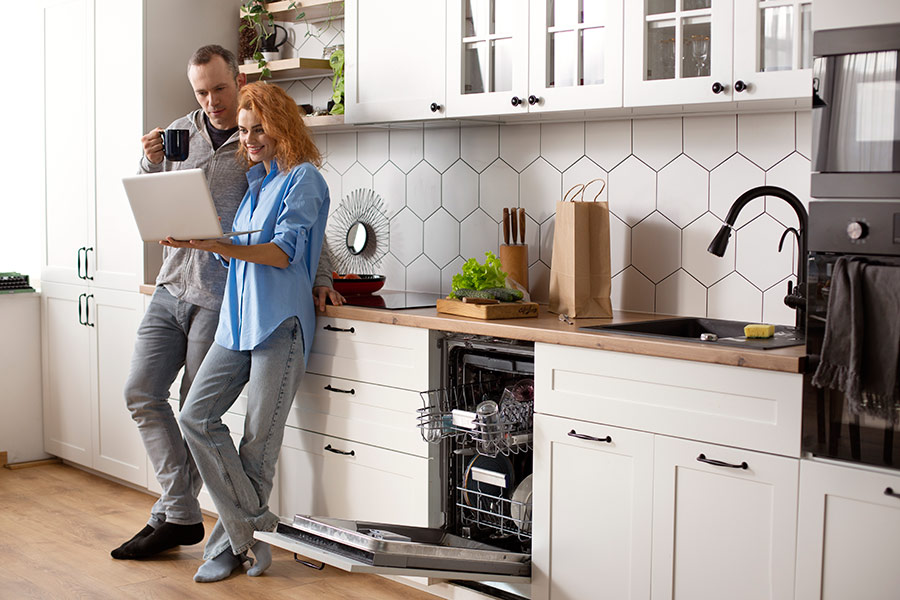
Owning a home is not just about having a place to live; it’s an investment in your comfort and future. Whether you’re looking to create a more enjoyable living space or aiming to increase your home’s resale value, a few strategic updates can make a significant difference. Here are three updates you can consider to enhance both your living experience and potential resale appeal.
Smart Home Integration: Embrace the Future of Living
In today’s tech-driven world, integrating smart home features can elevate your living experience while also adding value to your property. Smart home technology offers convenience, security, and energy efficiency, making your home more appealing to both your family and potential buyers.
Start with smart thermostats that allow you to control your home’s temperature remotely. This not only enhances comfort but also helps save on energy bills. Investing in a smart security system with cameras and sensors adds an extra layer of protection, giving you peace of mind and potentially increasing your home’s market value.
Consider installing smart lighting systems that can be programmed to match your mood or schedule. These systems often come with voice control options, making it easy to adjust lighting without even lifting a finger. Potential buyers are increasingly valuing homes with integrated smart technology, so this update could pay off both in terms of enjoyment and resale value.
Upgraded Kitchen Appliances: The Heart of the Home
The kitchen is often considered the heart of a home, and upgrading your kitchen appliances can significantly impact your daily life and the perceived value of your property. Consider replacing old, outdated appliances with modern, energy-efficient models.
Investing in high-quality, stainless steel appliances not only enhances the aesthetic appeal of your kitchen but also adds a touch of luxury. Look for appliances with advanced features such as convection ovens, smart refrigerators, and induction cooktops. These upgrades not only make cooking more enjoyable but also appeal to homebuyers who appreciate a well-equipped kitchen.
Additionally, consider updating the kitchen’s fixtures and finishes. New countertops, a stylish backsplash, or modern cabinet hardware can breathe new life into the space. Potential buyers often pay extra attention to the kitchen, so these updates can significantly boost your home’s resale value.
Landscaping and Outdoor Living Spaces: Extend Your Living Space Beyond Four Walls
Curb appeal matters, and the exterior of your home is the first thing potential buyers see. Enhancing your outdoor spaces not only makes your home more enjoyable but also contributes to a positive first impression.
Invest time and effort in landscaping to create a vibrant and well-maintained front and backyard. Planting colorful flowers, trimming hedges, and maintaining a lush lawn can make a big difference. Consider adding outdoor seating areas or a deck/patio to extend your living space outdoors. These features not only enhance your enjoyment of the home but also appeal to buyers looking for a well-designed outdoor space.
Incorporate sustainable and low-maintenance landscaping elements, such as native plants and drip irrigation systems. These not only make your home eco-friendly but also reduce the effort required for upkeep.
In conclusion, updating your home to enhance enjoyment and boost resale value doesn’t have to be a daunting task. By integrating smart home technology, upgrading kitchen appliances, and enhancing outdoor spaces, you can create a more comfortable living environment while making your property more attractive to potential buyers. Remember, these updates are an investment in both your present and future, allowing you to enjoy your home to the fullest while also reaping the rewards when the time comes to sell.
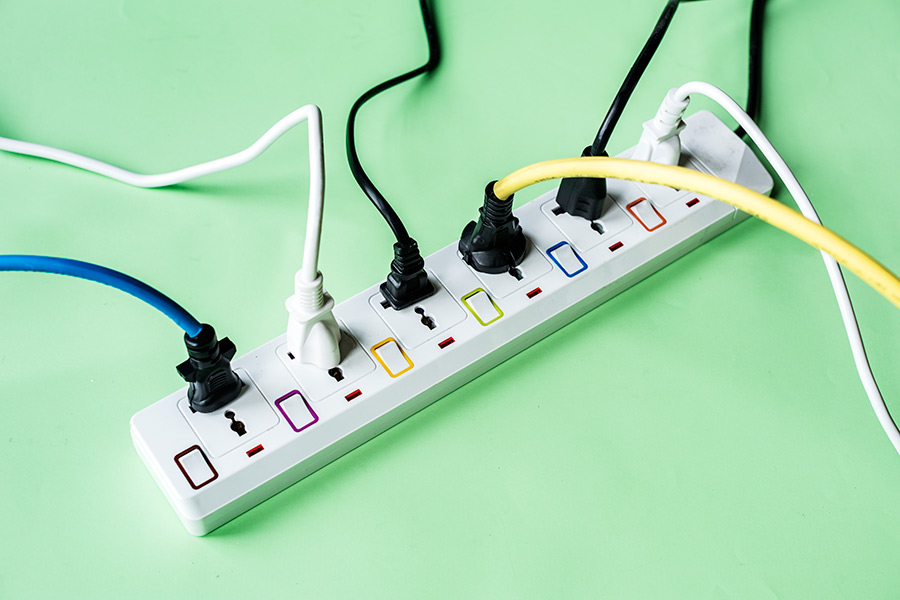
Unplugging devices and appliances when not in use isn’t just a small habit; it’s a savvy way to trim your energy expenses and contribute to a more sustainable environment. The potential savings from unplugging various household items can surprise you and come with added benefits beyond just reducing your yearly energy bill.
Electronics on Standby: Devices like TVs, gaming consoles, and computers can collectively consume up to 10% of your electricity bill. By unplugging or using power strips to cut off standby power, you could save around $100 annually.
Kitchen Appliances: Toasters, coffee makers, and microwaves draw power when plugged in, even if not actively used. Unplugging these can contribute to roughly $20-$30 in savings per year.
Chargers and Adapters: Phone chargers and laptop adapters left plugged in can cost about $10-$20 a year in wasted energy. Unplugging them when not in use is an easy way to cut down on this expense.
Entertainment Systems: TVs, DVD players, and sound systems can account for $50-$100 per year in standby energy costs. Using power strips or unplugging these devices when not in use can make a noticeable difference.
Lighting: Unplugging decorative or ambient lighting when not needed can save around $15-$20 per year, especially when it comes to string lights, lamps, and other decorative lighting.
Unused Rooms: Unplugging devices in rarely used rooms can save a few extra dollars per year, depending on the number of devices involved.
Reduced Environmental Impact: Unplugging devices minimizes unnecessary energy consumption, reducing your carbon footprint and contributing positively to environmental conservation efforts.
Extended Device Lifespan: Constantly keeping devices plugged in can lead to wear and tear over time. Unplugging them not only saves energy but also helps extend the lifespan of these appliances and gadgets.
Fire Prevention: Some devices, especially older ones or those with faulty wiring, pose a fire risk when left plugged in for extended periods. Unplugging reduces this risk significantly.
Enhanced Energy Efficiency: Beyond the financial savings, unplugging devices promotes energy efficiency at home. This habit can complement other energy-saving practices like using energy-efficient appliances and improving insulation.
Educational Opportunity: Embracing the habit of unplugging devices can serve as an educational opportunity for household members. It fosters an understanding of energy conservation and the impact of small actions on larger environmental issues.
In total, implementing these measures and making unplugging a part of your daily routine can lead to savings ranging from $200 to $300 annually. These savings might seem modest individually, but they add up significantly over time, contributing to a more efficient and cost-effective household.
Beyond the financial savings that come with unplugging devices, there are numerous other benefits, including environmental conservation, increased device longevity, and reduced fire risks. Embracing this simple habit is a win-win, benefiting both your wallet and the planet.

As we approach the start of a new year, it’s the perfect time to reflect on our living spaces and set resolutions to enhance our homes. Whether you’re aiming for a major renovation or small improvements, dedicating time and effort to your home can bring about a refreshing change and a renewed sense of pride in your space. Here are five New Year’s resolutions tailored for homeowners seeking to revitalize their homes in the upcoming year.
Start the year on the right foot by decluttering and organizing your home. Take stock of your belongings, donate items you no longer need, and organize the remaining possessions. Not only does this create a more visually appealing space, but it also promotes a sense of tranquility and orderliness in your home. Consider adopting a minimalist approach to maintain a clutter-free environment throughout the year.
Make a commitment to sustainability by investing in energy-efficient upgrades for your home. Consider installing LED bulbs, smart thermostats, energy-efficient appliances, and improving insulation. These upgrades not only reduce your environmental footprint but also lead to long-term cost savings on utility bills, making it a win-win for both the planet and your wallet.
Designate a specific area in your home solely dedicated to relaxation and self-care. Whether it’s a cozy reading nook, a meditation corner, or a spa-inspired bathroom, carve out a space where you can unwind and rejuvenate after a long day. Add comfortable seating, soothing lighting, and personal touches to make it a haven for relaxation.
Embrace your creativity by incorporating DIY projects and personal touches into your home. Whether it’s refurbishing old furniture, creating custom artwork, or adding a personal gallery wall, infuse your space with elements that reflect your personality and style. These unique touches not only add character to your home but also create a sense of ownership and pride in your living space.
Make a resolution to stay on top of home maintenance tasks throughout the year. Create a maintenance schedule for tasks such as HVAC system checks, gutter cleaning, roof inspections, and other essential upkeep. Regular maintenance not only prolongs the lifespan of your home but also prevents potential costly repairs down the line.
Remember, these resolutions are not just about transforming your living space; they’re about creating a more comfortable, functional, and enjoyable home for you and your loved ones. Don’t feel overwhelmed—start small and gradually work towards achieving your home improvement goals throughout the year.
In conclusion, the start of a new year presents an excellent opportunity to breathe new life into your home. By committing to these resolutions, you can create a space that not only meets your needs but also brings you joy and satisfaction every time you step through the door. Here’s to a year filled with home improvements and a renewed appreciation for the place we call home!
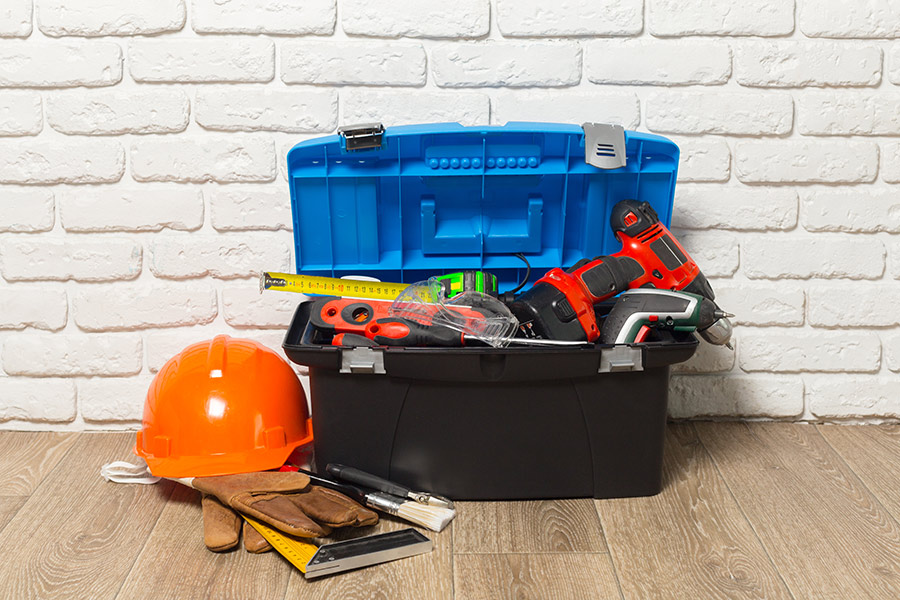
Congratulations on your new home! As you settle into this exciting chapter, it’s time to equip yourself with the essentials—especially with the holiday season being in full swing. While decking the halls and enjoying festive cheer, it’s smart to have the right tools handy for any unexpected fixes.
A versatile powerhouse for various tasks, from assembling furniture to hanging decorations. Opt for one with multiple torque settings for different materials.
A classic tool for everything from light woodworking to putting up picture frames. Choose a claw hammer for versatility.
An assortment of Phillips and flathead screwdrivers in various sizes will cover most household needs. Look for magnetic tips—they’re a game-changer!
Perfect for tightening nuts and bolts. An adjustable wrench is essential for plumbing and furniture assembly.
Accurate measurements are key for home projects. Choose a sturdy, easy-to-read tape measure for precision.
An indispensable tool for gripping, twisting, and cutting. A set with slip-joint and needle-nose pliers will handle a wide range of tasks.
Hanging pictures or shelves? Ensure they’re straight with a bubble level. Some smartphone apps mimic this tool, but a physical level is more reliable.
From opening packages to precision cutting, a sharp utility knife is incredibly useful for various tasks around the house.
Hanging heavier items like TVs or shelves? A stud finder will help locate the wooden framing behind walls for secure mounting.
Essential during power outages or for working in dimly lit areas. Consider a reliable LED flashlight for longevity and brightness.
Now, why specifically mention the holiday season? Picture this: you’re excitedly decorating your new home for Christmas, hanging lights and ornaments, when suddenly you encounter a minor mishap—a loose screw on your festive wreath or a stubborn nail for your stockings.
Having these tools on hand will save the day, ensuring your holiday home preparations go smoothly. You’ll be able to quickly fix any issues without disrupting the holiday spirit. Plus, they’ll prove handy long after the holiday season, becoming your go-to helpers for various home projects.
Remember, safety first! Invest in a good pair of work gloves and safety goggles to protect yourself while using these tools.
As you embark on this homeownership journey, consider these tools as your trusty companions. They’ll empower you to handle minor repairs and DIY projects with confidence, allowing you to create a space that truly feels like home.
May your new home be filled with warmth, joy, and the satisfaction of a well-equipped toolbox. Happy holidays and happy fixing!